How to Run FPGA Code
First Steps
The first thing that you need to do is write your code. Easy enough; let’s pretend that you’ve done that already.
I follow Professor Brake’s tutorial for most of this, and it was quite comprehensive. However, if you’d like even more photos, and specifically information on how I personally load onto my FPGA board, read on. The next thing that you need to do is a bit more difficult if you aren’t connected to your board properly, and that’s to Synthesize your code, like the pretty image below.

Start by installing Lattice Radiant. It’s straightforward, especially if you are following Professor Brake’s tutorial. I will talk specifically about installing the FTDI driver afterwards, as that was what was more difficult on my end.
Unfortunately, unless you’ve done it before you’ll probably need to install the FTDI Drivers that Professor Brake mentions. I’ll give you a tip, though, that you shouldn’t just go blindly clicking and installing every zip file that you see – for example, clicking the linke for “setup executable” will give a file that is meant for Windows computers (x86), not for your arm64 chip. Here are the proper steps:
Read through the Installation Guide for your situation. If you are like me, and are running a Windows Driver on your Mac, then use this Installation Guide. If you are even more like me, and you’re on a Mac with an M1 chip, you should carefully read and then ignore all of Sections 3.1 and 3.2 in this guide, and focuse solely on Section 3.3. As the document says, “Note: This is the only method to install the ARM64 or universal versions of the driver.”.
The rest of this process is quite straight forward, so long as you follow Section 3.3. The process will mainly be that you will first need to link your device into Parallels so that you can see it from inside the Parallels Device.
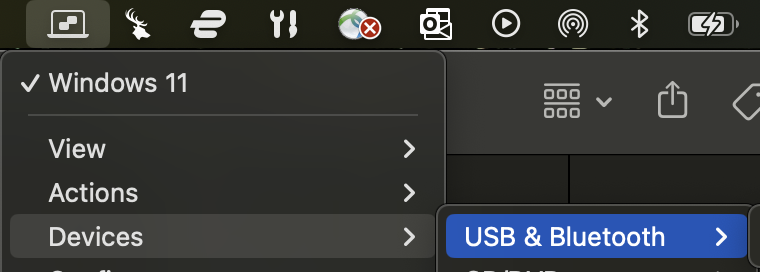
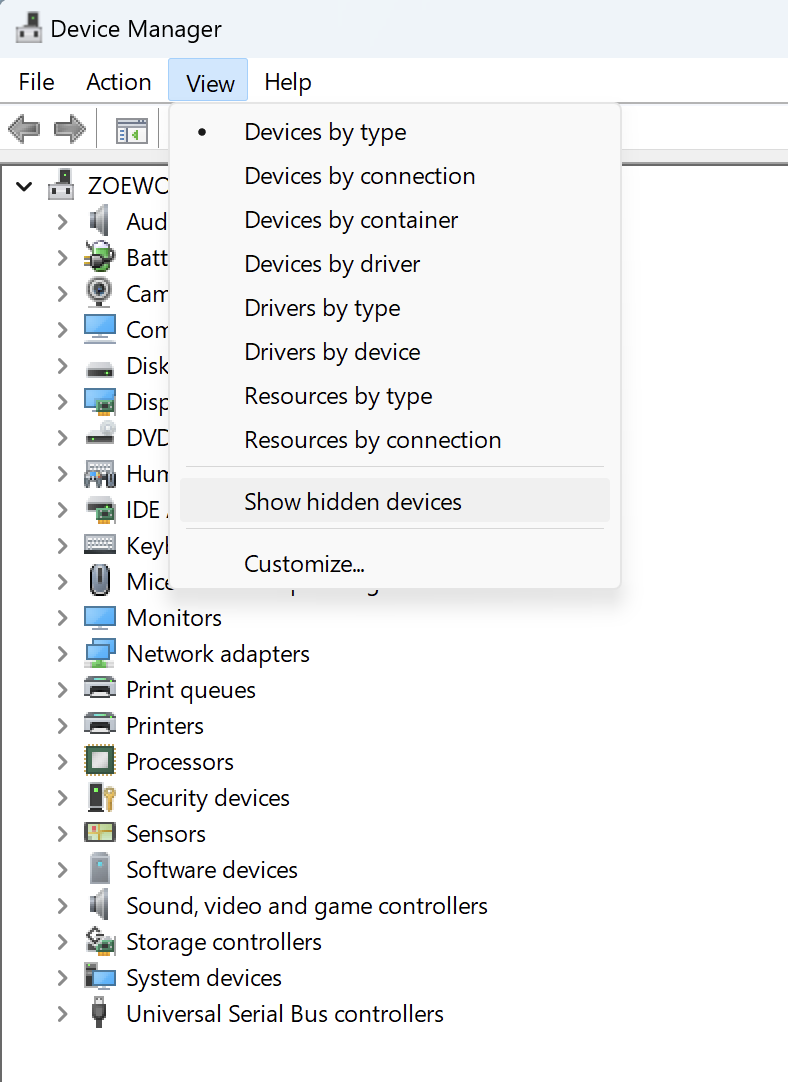
- You will then be told that you should be able to open Device Manager within Windows (just use the search bar at the bottom to find it) and immediately see the relevant Ports. If you are like me, you don’t see this and panic. Don’t worry: it’s just hidden from you because it’s currently broken. To rectify this, you need to click
View > show hidden devicesinside your Device Manager. Miraculously, you will suddenly see the samePortsfile that they are talking about in the installation guide.
- Continue following their recommended steps. Note that when you install the FTDI driver, you should install it on the Parallels Window Machine and not on your home Mac, as this will cause errors when the program tries finding it (at least, it did for me).
Kavi’s Code
This has been posted with Kavi’s permission
Kavi was tired of needing to hunt down the .bin file every time. Kavi is also really good at writing shell code. Resultantly, Kavi wrote the following code which will find the binary file that you need, so long as you are in the proper folder for it.
In order to install this shortcut, first you need to open your .zshrc file. For those of you who are extremely unfamiliar with terminal code, follow the following steps.
- In your terminal, type
vim ~/.zshrc. This does two things; vim is a way of opening and editing a current configuration code (or any code file) from within terminal. ~/.zshrc is one of what are called “shell” code files. The ~/ indicates that the path to this file is from your current user’s home file. The “.zshrc” file itself is hidden; if you runlsin your home directory, you’ll note that it doesn’t appear; you can only see it if you list files including hidden ones (ls -a). It is what is run when your computer starts up, and helps point your computer on where to go. It is also where you can write shortcuts for running commands within terminal, which is what we are about to do. Below is an image of what my ~/.zshrc program looks like.
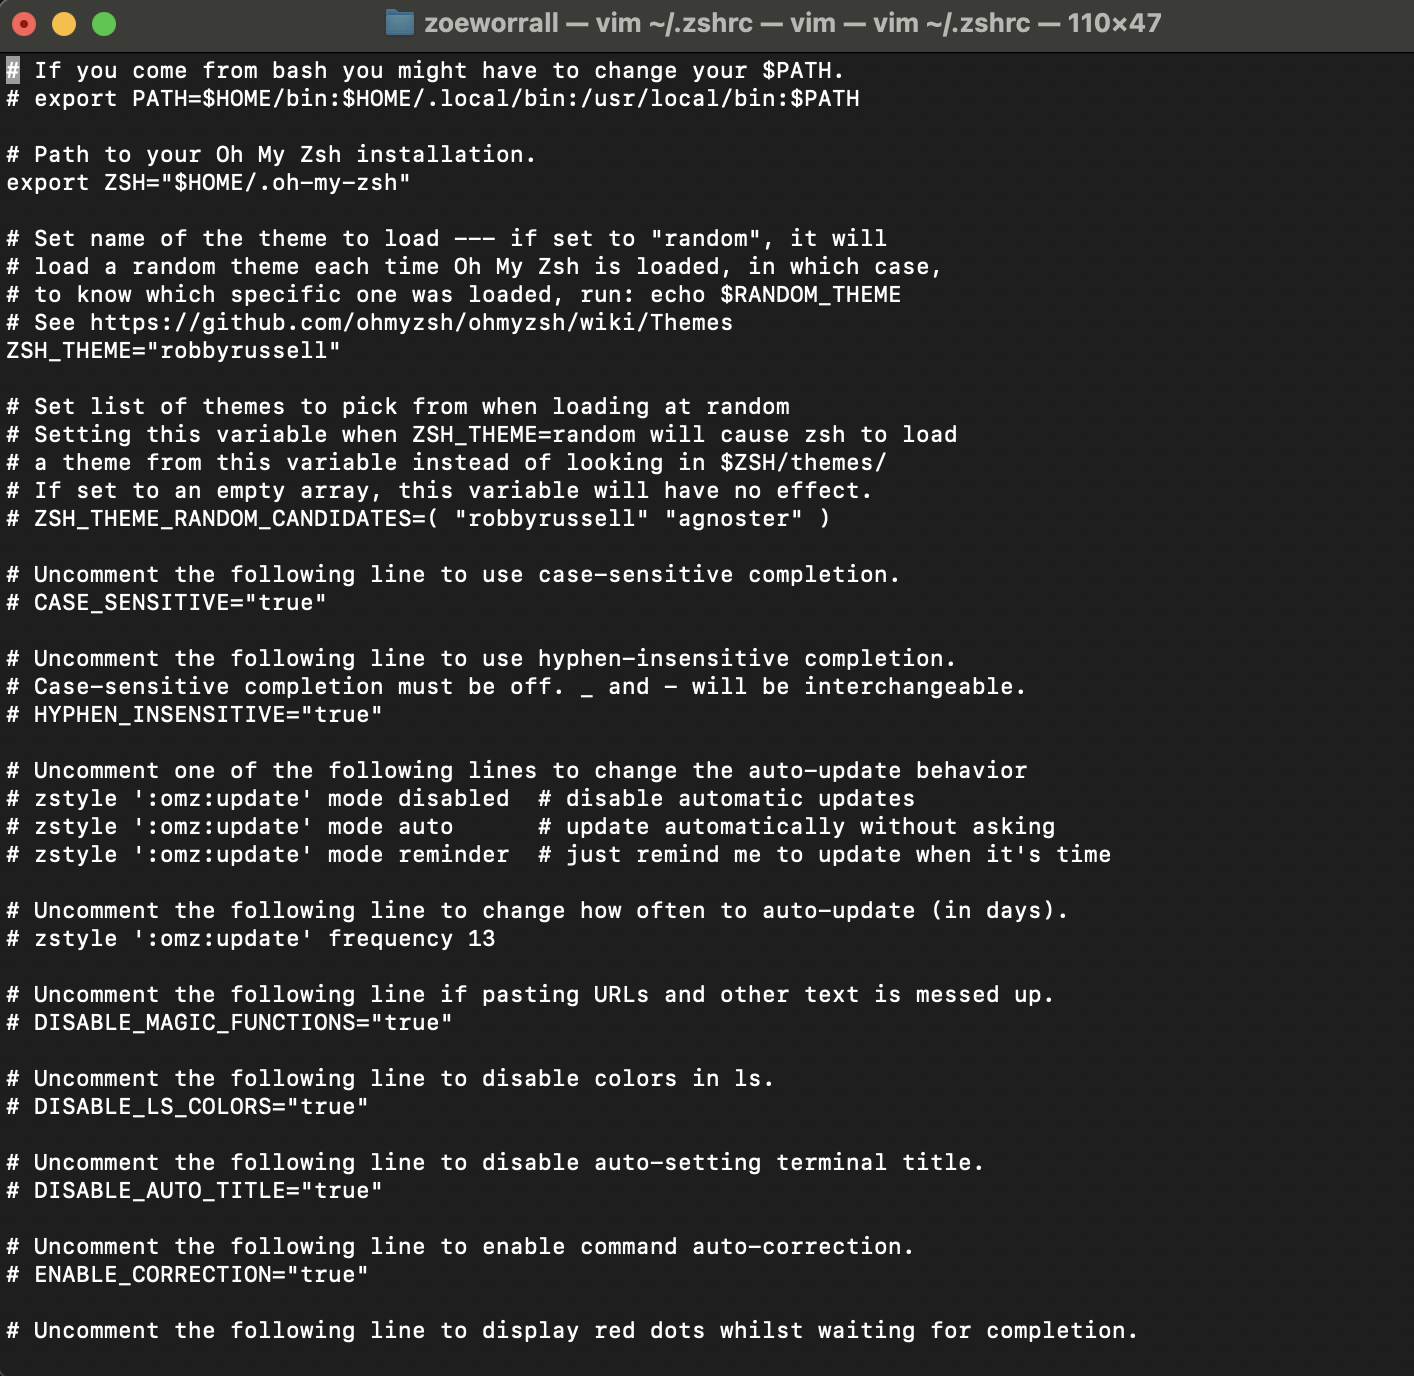
- You’ll note that when you have this file open using vim, you can’t type anything. In order to actually insert things into this file, you need to type the letter
i. This will put you into “Insert” mode, indicated by the-- INSERT --on the bottom of your screen. You can now type in this folder! But be careful; deleting things or entering random things will likely throw errors in your terminal, which are often gross and icky to clean up.

- Now that you’re in Insert mode, navigate to the bottom of this file (just press/hold down on the down arrows until you get there). Paste the following code.
#!/bin/bash
alias program_fpga="find . -name '*.bin' -print | xargs openFPGALoader -b ice40_generic -c ft232  -f"
What this effectively does is locates the bin file (assuming that you’ve only made one – please don’t add more than one bin file or random, weird behavior will happen and the code likely won’t run), and then enters this into the openFPGALoader program. If you’re unfamiliar with terminal, you’ll notice that there’s a line (called a pipe) | in the middle of the code; this indicates that after you’ve found the *.bin file, you push the output into the next code; in this case, its being used as an argument (xargs) in openFPGA viewer.
- Now that you’ve inserted it, a problem that I first had when I was learning how to use vim was how to get out of it (vim is one of many ways to edit this programs, by the way: some people prefer using vi, or something else they’ve downloaded off of the interwebs. It’s really up to you how you edit files in terminal – I’m just most familiar with vim). To leave, and especially to save what you just did, use the
Esckey. If you’ve decide that you don’t want to save your work, write:q!in the terminal and press Enter. This effectively quits the program without saving. If you DO want to save, instead you need to write:wq, which will save the edits that you’ve made to your ~/.zshrc file. You’ve now saved Kavi’s code, and if you want to run it, all you need to write in your terminal isprogram_fpga.
P.S. If you’d like to check that your changes were made inside of the program, you can experiment with that new pipe character you’ve just learned about to make sure that the file is in there. In your terminal, type cat ~/.zshrc | grep program_fpga. What this effectively does is:
- Uses
catto return all the text inside your ~/.zshrc file - Pipelines this text and selectively sorts it, using
grep, for the keyword “program_fpga”, which is the function we’ve just added.
If all went well, you should see the line alias program_fpga="find . -name '*.bin' -print | xargs openFPGALoader -b ice40_generic -c ft232 -f" returned! If nothing is returned, that means it wasn’t saved properly, and you’ll need to go back and make sure that it’s there and that there are no typos.
Running FPGA Code
The first step you need to take to running code off your FPGA board is locating where the folder containing this code is on your computer. Here is an example of how I find mine.
- I go to my Finder window, and go into
Locations. This is where I can see Parallels’s virtual Windows environment.
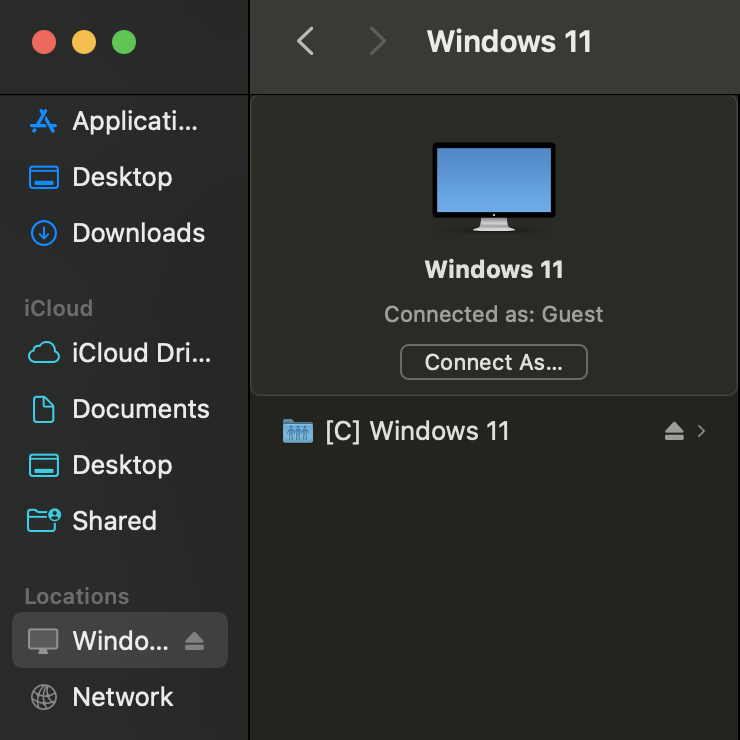
- I then navigate to wherever I’ve saved my file. Note that it is also possible to save your file on your Mac, and upload it to your FPGA from there. For me, I had difficulties connecting to my FPGA whenever I was on my Mac besides when I was using the terminal, and so I chose to avoid some frustration by storing all my files solely on Parallels.
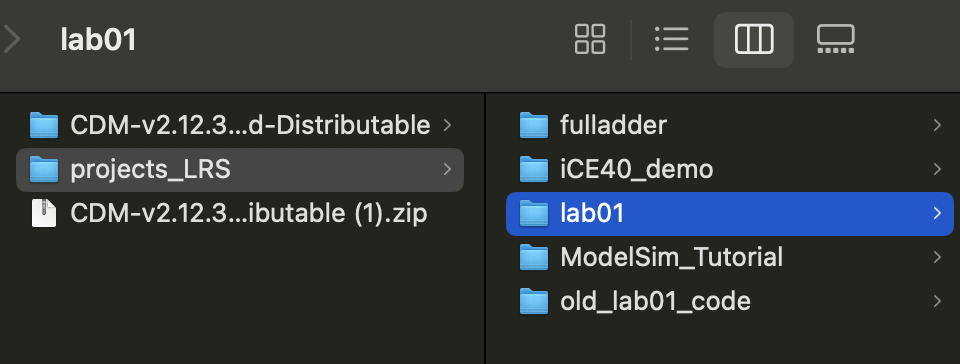
- By dragging the folder for your lab into terminal, you can enter this path within your terminal in order to run your FGPA, Lattice Radiant code.

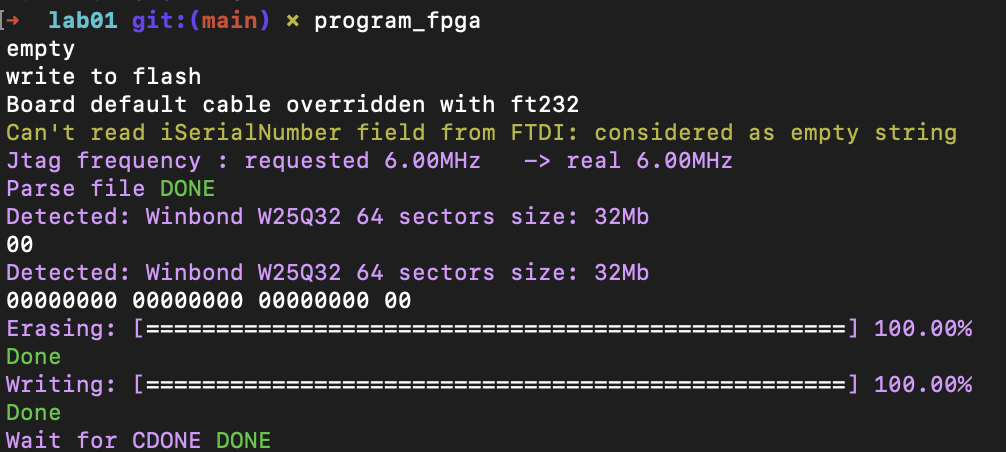
- Now that you are inside the program, you can run Kavi’s Code. Type
program_fpga, and if you are connected to your board correctly (make sure that you have the microUSB plugged into the FPGA and that the lights are turned on), the code that you have Synthesized will automatically upload onto the FPGA, and you’ll see it running in real time. To double check and confirm, your terminal should resemble the image below (potentially without the colors). Note that if you are like me, and using the Parallel’s virtual Windows environment, if you had the Upduino linked to your parallel’s page, you won’t be able to actually load the code onto your board. Make sure to uncheck the Parallel’s connection under the logo,Devices > USB & Bluetooth > ...to make sure that you can actually upload your code to your board.
Done!
And that’s it! Congratulations, you’re now able to run code from your FPGA board!